


When remodeling your bathroom, the choice between a backsplash and full tile walls depends on your budget, moisture protection needs, and design goals:
- Backsplash Installation: Costs around $480–$1,500 and takes 1–4 days. Ideal for areas with minimal water exposure (e.g., behind sinks or vanities). Offers decorative flexibility and is easier to maintain.
- Full Tile Walls: Costs $1,000+ (average $12.50 per sq. ft.) and takes 3–5 days. Best for wet zones like showers or tubs, providing superior moisture protection and a seamless, high-end look. Requires more upkeep due to grout maintenance.
Key Considerations:
- Cost: Backsplashes are more affordable for small projects; full tile walls are pricier but offer lasting durability.
- Moisture Protection: Full tile walls handle high humidity and direct water exposure better.
- Design: Backsplashes add accents; full tile walls create a cohesive, modern aesthetic.
- Maintenance: Backsplashes are easier to clean; full tile walls require regular grout care.
Quick Comparison:
| Feature | Backsplash Installation | Full Tile Walls |
|---|---|---|
| Cost | $480–$1,500 | $1,000+ |
| Installation Time | 1–4 days | 3–5+ days |
| Best Use | Behind sinks/vanities | Showers, tub surrounds |
| Moisture Resistance | Moderate | High |
| Maintenance | Easier | More effort (grout care) |
Choose backsplashes for quick updates or low-moisture areas. Opt for full tile walls in wet zones for long-term protection and a polished finish.

How to Tile a Backsplash
sbb-itb-e0ea4e0
What Is Bathroom Backsplash Installation?
A bathroom backsplash is a small-scale tile project designed to protect specific wall areas from water damage while adding a decorative touch. Unlike tiling an entire wall, backsplashes focus on high-moisture spots, helping to prevent water from seeping into drywall and causing issues like mold or stains [2][3].
Typically, a backsplash covers around 15 to 30 square feet, making it a cost-effective alternative to full-wall tiling [1]. This targeted approach not only saves money but also reduces the time and disruption involved in bathroom renovations. To ensure durability, a cement backer board is often used as the base instead of standard drywall, providing a water-resistant surface for the tile [3].
Where Backsplashes Are Installed
Backsplashes are commonly installed behind sinks, vanities, and mirrors – areas where water splashes and humidity are concentrated [2]. These spots, like where you wash your hands or brush your teeth, benefit from the added protection. Some homeowners also choose to install backsplashes behind toilets or on partial walls in powder rooms, focusing on areas with occasional water exposure rather than the constant moisture of showers or tubs [3].
Backsplash Tile Materials
When it comes to materials, ceramic and porcelain tiles are the go-to options for bathroom backsplashes. Ceramic tiles are budget-friendly, while porcelain offers greater durability and better resistance to moisture, making it ideal for humid spaces [2][4].
For a more upscale look, glass tiles are a popular choice. Priced between $5 and $32 per square foot, glass tiles reflect light beautifully, which can make small bathrooms feel larger. However, they require unsanded grout to avoid scratching their surface [10]. Natural stone options like marble, granite, and slate add a touch of luxury but need regular sealing to protect against moisture and stains [4].
Why Homeowners Choose Backsplash Installation
Backsplashes are an appealing option for homeowners looking to save on costs and time. These projects can be completed in just one to four days, minimizing bathroom downtime compared to larger tiling jobs [4].
Another advantage is the opportunity to use premium materials in smaller quantities. For instance, you can incorporate luxurious glass or natural stone tiles as accents while sticking to more affordable ceramic for the main sections. This approach allows you to create a stylish, custom look without overspending [2].
What Are Full Tile Bathroom Walls?
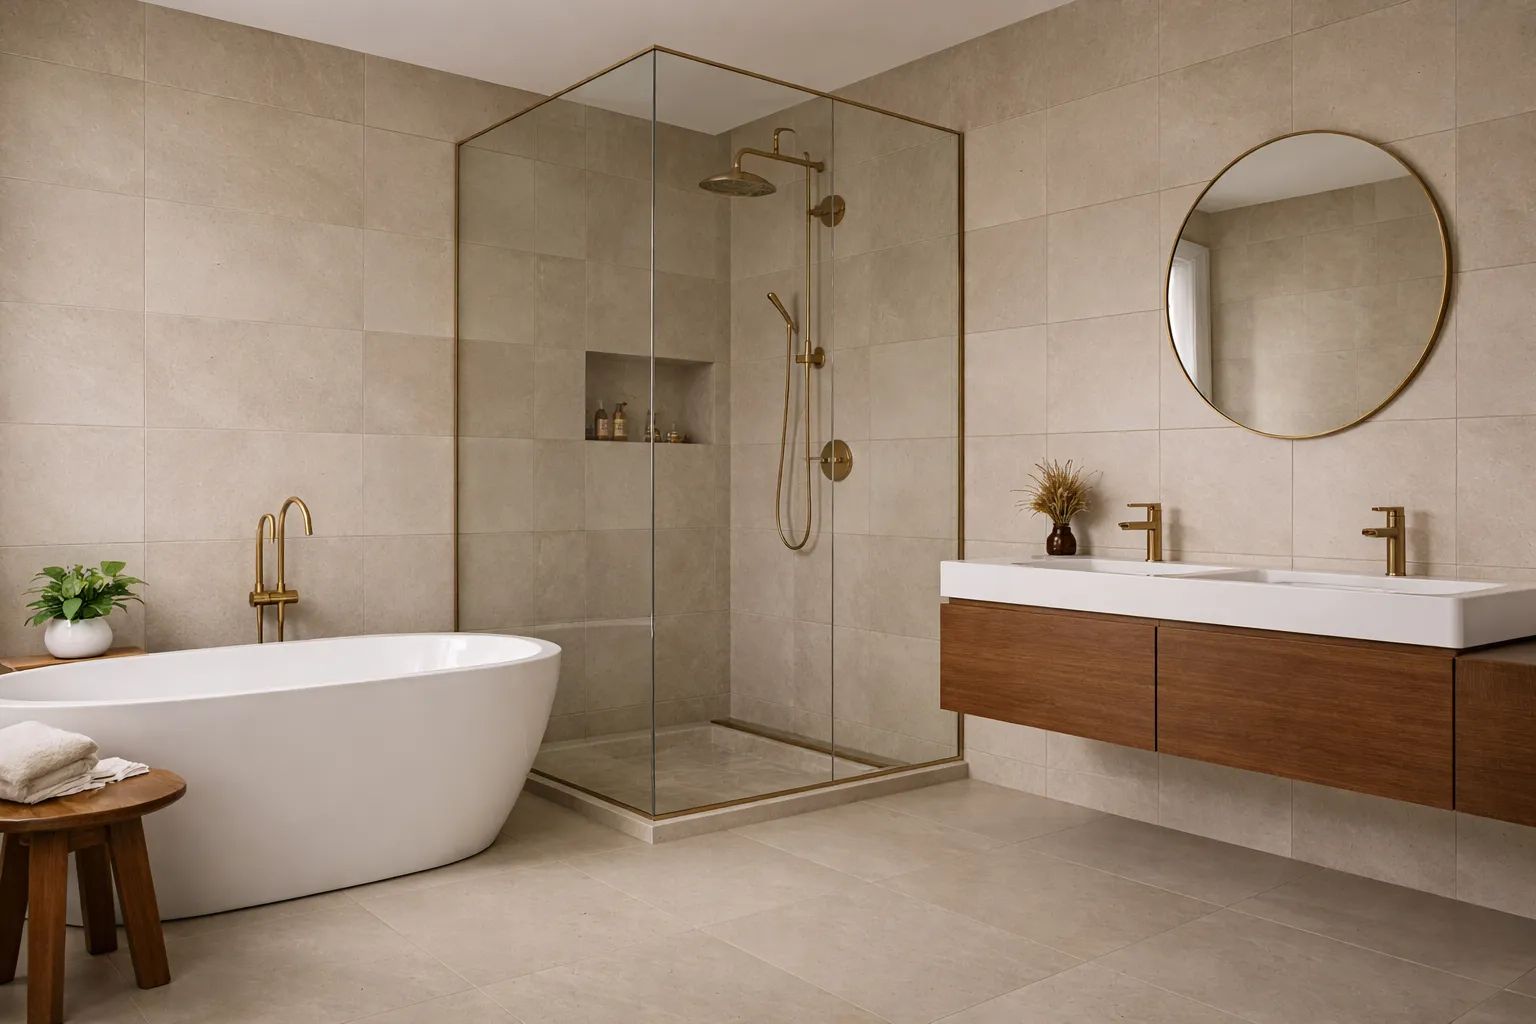
Full tile bathroom walls extend from floor to ceiling, covering every inch of the wall surface. This method creates a continuous barrier against moisture, which is particularly important in high-humidity spaces like bathrooms. By preventing water from seeping behind walls, full tile installations help avoid structural damage and mold growth – issues that are common in areas frequently exposed to steam and water [11][2]. Unlike smaller backsplash installations, full tile walls provide complete coverage, making them a more protective and durable option.
This investment often proves worthwhile, with midrange bathroom remodels featuring updated wall tiling delivering an average 70% return on investment [2]. Professional installation typically takes three to five days and costs around $12.50 per square foot, including labor [2].
Where Full Tile Walls Are Used
Full tile walls are most commonly found in areas where moisture protection is critical. Shower enclosures are a prime example, as floor-to-ceiling tiling creates a watertight space that safeguards the bathroom’s structure. Similarly, tub surrounds often feature tiles extending three to five feet above the tub rim – or even up to the ceiling – to protect against splashes and steam [2][11].
Some homeowners take it a step further by tiling all the bathroom walls from floor to ceiling. This approach not only enhances moisture protection but also creates a seamless, modern design that can make smaller spaces feel larger [4][6]. Even vanity walls are increasingly being tiled from countertop to ceiling, adding both style and practicality [4].
Material Options for Full Tile Walls
Covering entire walls with tile requires materials that are both durable and visually appealing. Popular choices include porcelain, natural stone, and glass tiles:
- Porcelain tiles are a top choice for full bathroom walls. Their dense composition makes them highly resistant to moisture, stains, and scratches, with installation costs ranging from $6 to $18 per square foot [11][2].
- Natural stone tiles, such as marble, granite, and slate, offer a high-end look with unique patterns. These tiles cost $11 to $23 per square foot installed [2][6]. However, because they are porous, they require regular sealing to maintain their appearance and durability in wet conditions [11].
"Natural stone tiles are generally more porous than porcelain or ceramic, making them susceptible to stains if not properly sealed. Regular sealing and maintenance are essential to preserve the appearance and durability." – The Tile Shop [11]
- Glass tiles are another popular option, particularly in modern bathrooms. They reflect light, making small spaces appear larger. Material costs average $32 per square foot, with installation costs between $35 and $47 per square foot [2][6]. Large-format tiles, which minimize grout lines for a cleaner look, are also trending, though they require precise leveling during installation [4].
Why Full Tile Walls Are Popular
The appeal of full tile walls lies in their durability and low maintenance. Unlike paint or wallpaper, which can fade, peel, or develop mildew in humid conditions, tiles – especially porcelain and natural stone – can last for decades when properly maintained. This longevity reduces the need for frequent repainting or repairs, saving time and money in the long run [11][2].
In addition to their practicality, full tile walls bring a sleek, modern aesthetic to any bathroom. This cohesive design creates a spa-like atmosphere that many homeowners and buyers find desirable, often boosting property value and contributing to the strong return on investment these renovations provide [2][9].
"Updating to a more attractive or modern look will make your bathroom more comfortable and highly lucrative if you ever sell your home." – Stephanie Minasian-Koncewicz [2]
Finally, the comprehensive moisture protection offered by full tile walls ensures that your home stays safe from water damage and mold. When installed with proper waterproofing methods, such as membranes or cement backer boards, these walls provide long-lasting protection for your bathroom and home structure [2][11].
Cost Comparison: Backsplash vs Full Tile Walls
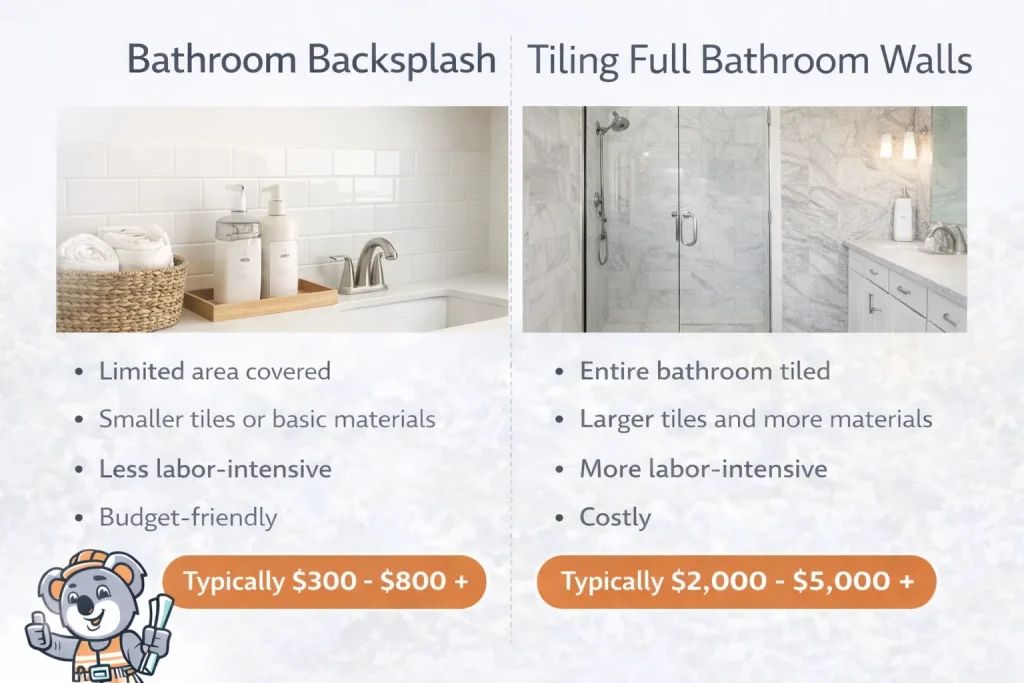
The cost difference between a bathroom backsplash and full tile walls can be quite noticeable. A bathroom backsplash usually falls between $480 and $1,500, with most homeowners spending around $1,000 on average [1][3]. On the other hand, full tile walls are priced at approximately $12.50 per square foot for standard installations. Depending on the size and materials used, total project costs can range from $1,000 for a medium bathroom to $1,875 or more for larger spaces, with premium remodels exceeding $12,000 [2][4].
This price gap primarily comes down to square footage. Full tile walls require significantly more materials, labor, and preparation work compared to a backsplash. Let’s break this down further.
Bathroom Backsplash Installation Costs
The final cost of a backsplash is heavily influenced by your choice of materials. For instance, basic ceramic tiles can start as low as $0.15 per square foot, while luxurious marble tiles may cost up to $150 per square foot [2][3]. Labor costs typically range from $5 to $20 per square foot, but intricate designs like herringbone or mosaic patterns can push labor rates to around $100 per hour [1][3].
"The material you choose will be the most significant cost factor, but you’ll need to budget between $5 and $20 per square foot for backsplash installation labor."
Bathroom backsplashes tend to be pricier per square foot than kitchen backsplashes. This is because bathrooms require cement backer board instead of regular drywall to handle moisture exposure, which increases material costs [3]. If you’re replacing an existing backsplash, you should also budget an extra $3 to $6 per square foot for removal and disposal [1][3].
Full Tile Bathroom Wall Costs
When it comes to full tile walls, the costs escalate due to the larger surface area and additional preparation requirements. Standard bathroom tiling projects average $12.50 per square foot, but areas like showers – which need extra waterproofing – can cost up to $25 per square foot [2]. For example, tiling a medium-sized bathroom (about 80 square feet) might cost $1,000, while a larger bathroom (150 square feet) could total $1,875 or more [2].
The higher costs aren’t just about the extra materials. Full tile wall installations require waterproofing membranes, cement backer boards, and wall leveling compounds to ensure a moisture-resistant and even surface [2][3]. These preparations can add $1–$3 per square foot [6]. Additionally, full tile installations usually take three to five days, compared to just one or two days for a backsplash, further increasing labor costs [2][9].
Using larger tiles can help cut labor costs since they cover more area quickly compared to smaller tiles or mosaics [3][6]. However, premium materials like natural stone or large-format porcelain may require specialized tools and precision cutting, which can drive labor rates higher [11][3]. To avoid running short, it’s smart to order 10% to 15% extra material to account for cuts and potential breakage during installation [3][2].
| Bathroom Size | Average Total Cost for Full Retiling |
|---|---|
| Small (40 sq. ft.) | $500 [2] |
| Medium (80 sq. ft.) | $1,000 [2] |
| Large (150 sq. ft.) | $1,875 [2] |
Understanding these cost factors will help you weigh the benefits of moisture protection, durability, and design when planning your bathroom remodel.
Moisture Protection and Durability
When considering moisture protection and durability, the difference lies in the level of water exposure and the protection required. A backsplash behind a vanity handles occasional splashes but isn’t designed for the constant moisture and direct water exposure found in showers and tubs [3]. Full tile walls, on the other hand, are built for high-moisture environments, equipped with waterproofing systems to prevent water damage [11]. This distinction shapes both material choices and maintenance needs.
Moisture Protection by Area
Vanity areas are generally considered dry zones. Here, a backsplash protects the wall from toothpaste splatters and sink spray. However, even these installations need a proper substrate to handle long-term humidity [3].
Showers and tub surrounds are entirely different. These wet zones demand full tile walls paired with waterproofing systems like Schluter Kerdi or RedGard membranes. These systems, costing about $2 to $3 per square foot, are essential to keep water from seeping into the wall structure [2]. Without them, moisture can infiltrate grout lines, leading to structural damage.
"The shower wall tile you choose is more than just decoration – it protects your walls and simplifies cleaning." – US Granite Marble [12]
The choice of material is also crucial for moisture resistance. Porcelain tile, being denser than ceramic, is nearly waterproof and ideal for high-humidity areas [11]. In contrast, natural stones like marble or travertine, while visually appealing, are porous and require regular sealing – typically every few years at a cost of $5 to $10 per square foot – to prevent moisture absorption and staining [6].
Maintenance and Mold Prevention
Initial protection is only part of the equation; ongoing maintenance is equally important. Grout lines, being porous, are a common weak spot. If sealant fails, moisture can penetrate, encouraging mold growth [2]. While a small backsplash has minimal grout to maintain, full tile walls – especially in showers – have extensive grout networks that need regular cleaning and re-sealing.
"Seeing mold on your grout indicates it’s become porous due to the sealant failing… It can also signify further moisture and mold issues behind the tile." – Stephanie Minasian-Koncewicz, This Old House [2]
Backsplashes, with their smaller surface area and limited exposure to steam or standing water, are easier to clean [5]. Full tile walls, however, require more effort, as regular grout maintenance is necessary to prevent moisture from reaching the underlying structure. Proper ventilation also plays a key role in reducing mildew risks.
| Feature | Backsplash Installation | Full Tile Walls |
|---|---|---|
| Best Location | Behind vanities/toilets | Showers, tubs, wet rooms |
| Moisture Resistance | Moderate (depends on material) | High (with proper waterproofing) |
| Mold Risk | Low in dry areas; higher in wet areas | Low (with proper maintenance) |
| Maintenance Level | Lower; limited to specific splash zones | Higher; regular grout upkeep needed |
| Cleaning Ease | Easier due to smaller surface area | More challenging due to larger area |
In short, while backsplashes are well-suited for areas with minimal moisture, skimping on waterproofing in wet zones can lead to costly repairs. Investing in proper waterproofing and choosing the right materials ensures long-lasting durability.
Design Impact and Space Considerations
Design choices are just as important as cost and durability when deciding on the best tiling approach for your bathroom. Beyond practicality, the design you choose influences both the functionality and overall vibe of the space. For example, backsplashes can act as decorative accents, adding pops of color and texture, while full tile walls – especially those with large-format tiles – create a sleek, modern look that can make a bathroom feel more spacious [8][7]. Understanding these design differences can help you determine the best fit for your bathroom layout.
When Backsplashes Work Best
Backsplashes are a fantastic option for smaller bathrooms or when you’re looking for a focused, cost-effective upgrade rather than a full renovation [3][4]. Since a backsplash typically covers a smaller area, it’s a budget-friendly way to refresh your space [4]. For instance, white subway tiles can brighten up a compact or dimly lit bathroom [3]. If you’re working with a limited budget, you can mix materials – using affordable ceramic or porcelain for the main area and reserving pricier glass or hand-painted tiles for accents. This approach delivers a striking design without the cost of tiling an entire wall [2].
"Individual tiles… allow for total customization, so your backsplash ideas and imagination are the only limitations." – Stephanie Mickelson [3]
Backsplashes also offer endless design possibilities, from herringbone patterns to intricate mosaics [7]. However, keep in mind that more complex patterns can increase labor costs by 20% to 50% compared to simpler installations [4].
The Look of Full Tile Walls
Full tile walls, on the other hand, create a completely different aesthetic and spatial effect. They provide a polished, high-end look that works particularly well in larger, modern bathrooms [7][4]. Covering over 50 square feet, these installations can give the space a luxurious, expansive feel [4]. Large-format tiles or solid slabs are especially popular for full walls, as they reduce grout lines, making the surface appear seamless and easier to maintain [7][4].
"Full tile walls excel in modern bathrooms prioritizing easy maintenance and sleek aesthetics. Tile backsplashes offer unmatched design flexibility." – Cassie Kwong [7]
In spacious bathrooms, full tile walls make a bold statement, particularly in wet zones like showers or around tubs. They not only provide excellent moisture protection but also enhance the room’s perceived value. If you’re looking for a compromise, consider tiling just a focal point – like the wall behind a vanity. This approach achieves a dramatic effect without the cost of tiling every surface [3].
Installation Time and Bathroom Downtime
When planning a bathroom remodel, knowing how long your space will be out of commission is key. The timeframes for backsplash installations versus full tile wall projects can affect both your daily routine and your budget.
Fast Installation for Backsplashes
Backsplashes are a quicker option, perfect for those looking for a fast upgrade with minimal inconvenience. A professional can complete a standard backsplash in just 2–3 days: one day for preparation, another for setting the tiles, and a final day for curing and grouting [13][6]. The adhesive requires an overnight cure before grout application [9][3].
"A professional remodeler contractor may do the work in as little as two days… Even professionals must wait a whole night before grouting the tiles." – Artistic Tile and Design [9]
You can speed up the process by handling some prep work yourself, like removing old tiles, clearing countertops, and cleaning the area before the contractor arrives [3][6]. Opting for larger tiles or prearranged tile sheets on mesh backing can also cut down installation time compared to smaller or more intricate designs [3][4].
However, full tile wall installations are a different story, requiring more time and effort.
Longer Installation for Full Tile Walls
Full tile walls involve additional steps, such as waterproofing and substrate preparation, which significantly extend the timeline. Professionals typically take 3 to 5 days for a standard bathroom project, while more complex designs can stretch to 5 to 7 days or more [2][13]. For a bathroom covering 40 to 80 square feet, the breakdown usually includes: 1 to 2 days for demolition and prep, 1 to 2 days for waterproofing, 2 days for setting tiles, and 1 day for grouting and sealing [13].
The downtime for your bathroom is more substantial with full tile walls. After grouting, areas like showers and floors must remain unused for 48 to 72 hours, and full adhesive curing can take up to a week [4]. If you’re tackling the project yourself, expect the timeline to double – a professional’s 2-day backsplash job could take a DIYer a week or more [9].
These longer timelines mean more disruption and require careful planning to minimize the impact on your daily life.
Which Option Is Right for Your Bathroom?
Your choice depends on your budget, how much moisture the space will face, and your overall design vision. A backsplash behind the vanity works well for areas with minimal water exposure, like powder rooms or guest bathrooms. On the other hand, full tile walls are essential for showers and wet rooms where protecting against moisture is a top priority.
When to Choose Backsplash Installation
Backsplash installation is a practical option if you’re working with a tighter budget or planning a small-scale update. These projects typically cost between $480 and $1,500, making them an affordable way to refresh your vanity area without diving into a full remodel [4]. Backsplashes are perfect for low-moisture spaces, such as powder rooms or half baths, where water exposure is limited to occasional splashes from the sink.
They’re also a great choice if you want to add a stylish accent or protect the wall behind the sink without committing to a larger renovation. Large-format ceramic or porcelain tiles, priced between $1 and $15 per square foot, can help keep costs down while still achieving a polished finish [4].
When to Choose Full Tile Walls
For homeowners focused on durability and moisture protection in wet areas, full tile walls are the way to go. These walls create a seamless, waterproof barrier ideal for showers and tub surrounds, offering superior protection against moisture. Porcelain tiles are particularly well-suited for these installations due to their dense composition and low water absorption, making them more durable than ceramic or natural stone in wet environments [11].
Full tile wall projects, especially those covering over 50 square feet, typically cost between $4,000 and $12,000. Installation can take 3 to 5 days or longer, depending on the complexity, but these projects deliver a 70% return on investment in midrange bathroom remodels [4][2]. In larger bathrooms, tiling multiple walls creates a cohesive and polished design that feels intentional rather than pieced together [5].
If your priority is long-term durability and moisture protection, full tile walls are the better choice – even if they come with a higher upfront cost. Ultimately, your decision should weigh your immediate budget against the need for lasting functionality and style.
Common Mistakes to Avoid
When it comes to tiling projects, homeowners often fall into costly traps. A frequent misstep is choosing porous materials like marble, limestone, or travertine for wet areas. These natural stones may look stunning, but they easily absorb moisture and stain – even with sealant applied [11]. Another common error is relying on peel-and-stick tiles, which may seem like a quick and easy fix but don’t hold up in humid spaces. Traci Snyder, Vice President of Marketing at Improveit Home Remodeling, cautions:
"Peel-and-stick tile can be a good short-term solution for a pop of color in other places in your home, but avoid using it in your bathrooms. The high moisture level can create issues with the tile sticking" [3].
Skipping waterproofing is another mistake that can lead to significant damage and expenses. Many people assume that tiles and grout are naturally waterproof, but that’s not the case. Most wall-grade ceramic tiles have a water absorption rate of 3–7%, meaning they require a waterproof membrane underneath [15][17]. Without this step, moisture can sneak into walls and subfloors, leading to issues like rotted wood, mold, and even structural failure [14][16]. While waterproofing adds a small upfront cost, it’s far cheaper than the extensive repairs needed to fix water damage, which could involve removing all tiles and the substrate [6].
Another overlooked factor is underestimating extra material and preparation costs. It’s crucial to buy extra tiles to account for cuts, breakage, or future repairs [1][2][3]. Additionally, preparation work – like removing old tiles, fixing damaged drywall, and installing cement backer board – is essential for a durable, professional-looking result [1][4]. Skipping these steps can lead to uneven tiles and poor adhesion, which diminishes the overall quality of the project.
Lastly, hiring inexperienced labor is a risk that can backfire. As professional tile educator That Tile Chick points out:
"You risk thousands of dollars’ worth of damage when you hire an inexperienced person to build something as complex as a shower in your home" [11].
Proper waterproofing and installation require specialized skills, so it’s vital to verify your contractor’s credentials. Resources like the National Tile Contractors Association (NTCA) database can help you find qualified professionals who adhere to industry standards. Steering clear of these common errors sets the stage for a successful tiling project, which we’ll explore further in the next section.
Getting a Professional Assessment and Free Quote
When it comes to remodeling, a professional assessment can make all the difference. Contractors bring expertise that goes far beyond what DIY research can offer. For example, they evaluate the structural condition of your walls and determine the exact materials needed for the job [3][6]. They also consider layout challenges – like corners, outlets, and windows – that can affect labor and material requirements [4].
A professional’s insight often uncovers hidden issues that might be overlooked by a DIY approach [2]. Stephanie Mickelson, a contributing writer at Angi, emphasizes:
"A pro can help you decide which material best suits your budget, lifestyle, and decor" [3].
This kind of guidance helps homeowners make informed choices, such as deciding between durable, moisture-resistant porcelain and natural stone, which requires regular sealing [4][6]. When paired with earlier cost and design planning, professional advice ensures a smoother and more efficient remodeling process.
To get the most accurate pricing, it’s a good idea to obtain three itemized bids. These should break down costs for tile, labor, removal, prep work, and finishing. Also, make sure the contractor carries liability insurance and backs their work with a warranty [2][4].
If you’re planning a bathroom remodel, you can request a free, no-obligation quote by sharing your project details at KoalatyRemodel.com. Thousands of homeowners have already used this tool to connect with highly rated local contractors [2]. These professionals provide accurate assessments, taking precise measurements to minimize material waste and avoid unexpected shortages [18]. Submit your project details today at KoalatyRemodel.com to get started with a trusted contractor.
Conclusion: Making the Right Decision
Deciding between a backsplash and full tile walls comes down to your budget, the level of moisture protection needed, and your preferred style.
Backsplashes are a cost-effective way to protect specific areas and can be installed quickly. They work well in spaces like powder rooms or behind vanities where water exposure is minimal.
On the other hand, full tile walls provide excellent moisture protection and create a luxurious, spa-like feel. While they require a larger investment, they deliver lasting durability, making them perfect for areas like walk-in showers or other high-moisture zones.
There’s no one-size-fits-all answer. In spaces with little water exposure, a simple backsplash might suffice. However, for a master bathroom or areas with heavy water use, full tile walls could be the better choice. Many homeowners strike a balance by combining both – utilizing full tile walls in wet zones and adding a stylish backsplash behind the vanity.
Ultimately, the best option depends on your space and how it’s used. If you’re still unsure, consulting a professional can help you weigh the pros and cons to find the perfect solution for your needs.
FAQs
What are the advantages of choosing full tile walls instead of a backsplash for a bathroom?
Choosing full tile walls for your bathroom comes with some standout benefits. First and foremost, they offer excellent moisture protection. Thanks to the use of waterproof backer boards and membranes during installation, full tile walls are perfect for wet areas like showers and around tubs. This setup helps guard against water damage, mold, and mildew, keeping your bathroom in great shape for years to come.
Another perk is their sleek and unified design. Full tile walls give your bathroom a polished, modern feel that works well in contemporary remodels. Beyond aesthetics, they can also boost the perceived value of your home, making them a smart choice if you’re thinking about selling down the line.
How do the costs of materials and installation compare between a backsplash and full tile walls?
The cost difference between installing a backsplash and full tile walls largely depends on the size of the area and the complexity of the work involved.
Backsplashes are smaller projects, usually installed behind sinks or vanities. Material costs for backsplashes typically range from $15 to $40 per square foot, and the total installation costs fall between $480 and $1,500. Since these projects are smaller and use fewer materials, they are generally quicker to complete and more budget-friendly.
On the other hand, full tile walls cover larger areas, such as shower walls or entire bathrooms. These projects come with higher expenses due to the larger surface area and additional labor required for tasks like surface preparation and waterproofing. The average material cost is about $12.50 per square foot, with total project costs typically ranging from $450 to $2,000, depending on the size of the space and the materials selected. While the upfront cost is higher, full tile walls offer enhanced durability and better moisture protection, making them ideal for wet areas like showers.
How do I decide between a backsplash and full tile walls for moisture protection in my bathroom?
When deciding between a backsplash and full tile walls for moisture protection, it’s essential to think about how much water the area is exposed to. Full tile walls are the go-to option for spaces like showers and around tubs, where moisture is constant. These walls are built with waterproof backer boards and membranes, making them highly resistant to water. Backsplashes, however, are better suited for areas with less water exposure, such as behind bathroom vanities, where splashes are occasional.
Regardless of your choice, proper sealing is key. While backsplashes can handle lower-moisture areas effectively, full tile walls provide a higher level of protection in spaces where water exposure is frequent. If keeping moisture out is your main concern, especially in wet areas, full tile walls are a safer bet. For a tighter budget or areas with less water, a well-sealed backsplash can still do the job.