

Yes – white subway tile can make a shower look cleaner and brighter, but the final result depends more on layout, grout, finish, lighting, and waterproofing than the tile itself. If I want this look to work, I need to plan the shower first, avoid thin edge cuts, pick a grout color that fits how often I clean, and spend money on the parts behind the tile – not just the tile I see. For broader planning context, review the shower remodel guide. This choice also fits within a broader bathroom remodel.
Here’s the short version:
- Plan the shower before the tile. This helps line up valves, niches, and edges.
- Use proper waterproofing. In wet areas, tile is not enough on its own.
- Pick the right layout. Horizontal feels classic, vertical adds height, stacked looks neat, and herringbone takes more labor.
- Choose grout with upkeep in mind. White grout shows dirt fast; light gray is often easier to live with.
- Match the finish to the light. Glossy reflects more light; matte hides spots better.
- Add contrast around the shower. Wood vanities, darker floors, and metal finishes keep white tile from looking flat.
- Spend where it counts. A full subway tile shower often runs $1,500 to $4,000, with tile at about $2 to $5 per sq. ft. and labor at $7 to $15 per sq. ft.
If I had to boil the whole article down to one point, it would be this: plain white tile can look polished for years if the install is straight, the grout choice is smart, and the wall system is built to handle water.
| Choice | What matters most | What to watch for |
|---|---|---|
| Layout | Room shape and sight lines | Bad alignment and sliver cuts |
| Grout | Look vs. cleaning | White stains fast; dark can haze |
| Finish | Light level and water spots | Gloss shows film; texture holds residue |
| Waterproofing | Membrane and sealed joints | Failure behind the tile |
| Budget | Labor and prep work | Cutting costs on wall prep |
So before I fall for a tile sample, I’d make sure the shower plan, lighting, and install details are all working together.
24 Best White Subway Tile Shower Ideas and Designs
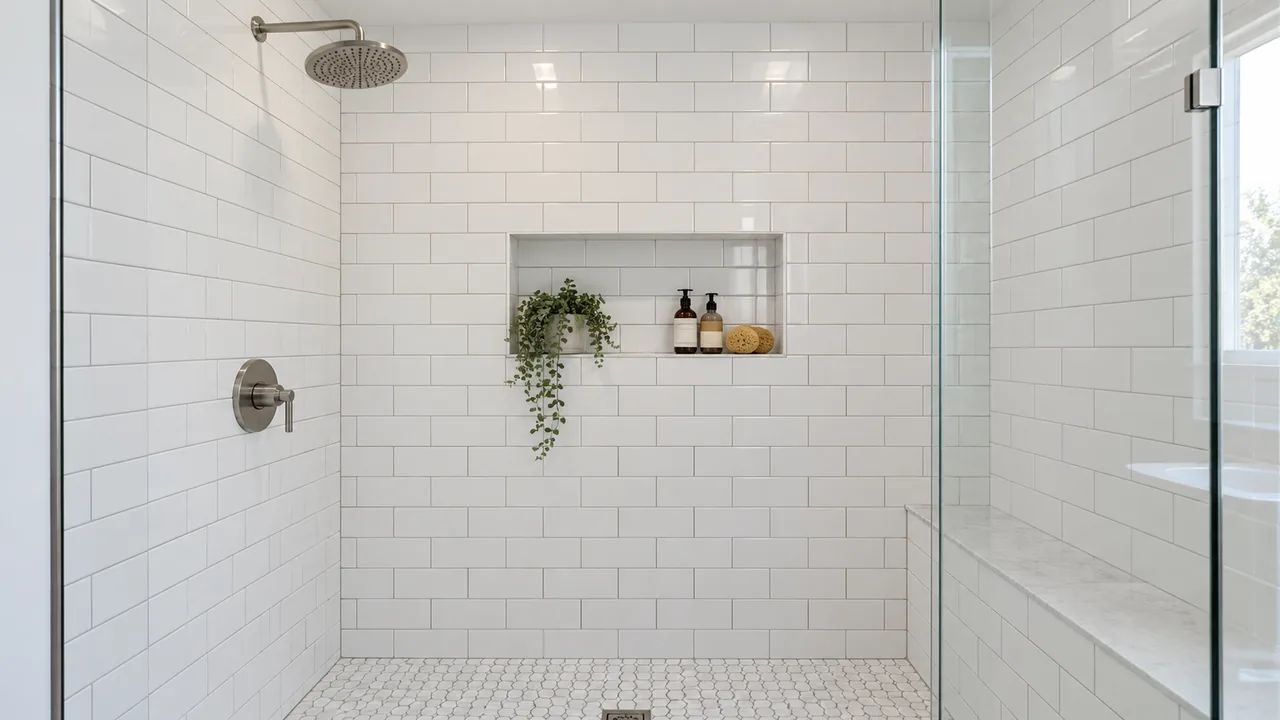
Plan the Shower Before You Pick the Tile
Start with the shower layout. That way, the tile lines up with valves, niches, and trim cuts. It also helps you avoid those skinny little edge pieces that make a shower look off. Once the shower plan is locked in, you can match the tile to the vanity, flooring, and hardware.
Match White Tile to the Full Bathroom Design
Think of white tile as one part of the whole bathroom, not a stand-alone pick. The vanity, flooring, and hardware should all work with the tile, not come in later as an afterthought.
Warm wood vanities can take the edge off an all-white look. Matte black, brass, brushed nickel, or chrome hardware adds contrast and gives the room some shape. For the floor, marble hex or patterned porcelain helps keep the space from feeling like a plain white box. Once you’ve settled on the finish palette, the next step is the wall build and waterproofing.
Prep and Waterproof the Shower Before Tiling
A good-looking shower still needs the right wall system behind the tile. Tile and grout help shed water, but the substrate and waterproof membrane are what keep the assembly dry.
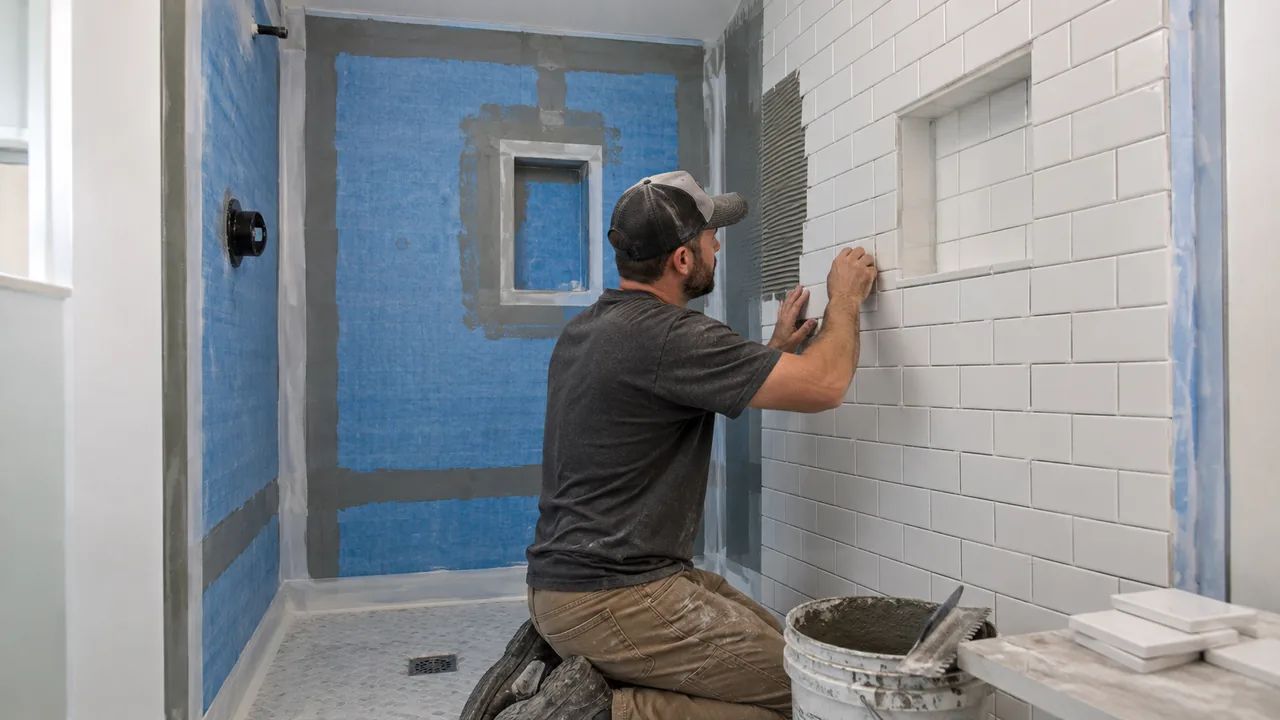
Don’t use drywall or green board on shower walls. Use cement backer board or waterproof foam backer board, then add a waterproof membrane before any tile goes up. That can be a sheet system like Schluter-KERDI or a liquid-applied product like RedGard. The membrane should be flood-tested before tile installation [1][5].
Seal all corners, seams, and pipe penetrations at the membrane. ANSI A108.5 calls for at least 95% thin-set coverage under each tile in wet areas [5].
A tile job can look clean on day one and still fail if the waterproofing is done wrong.
Layout, Grout, and Finish: How Each Choice Shapes the Final Look

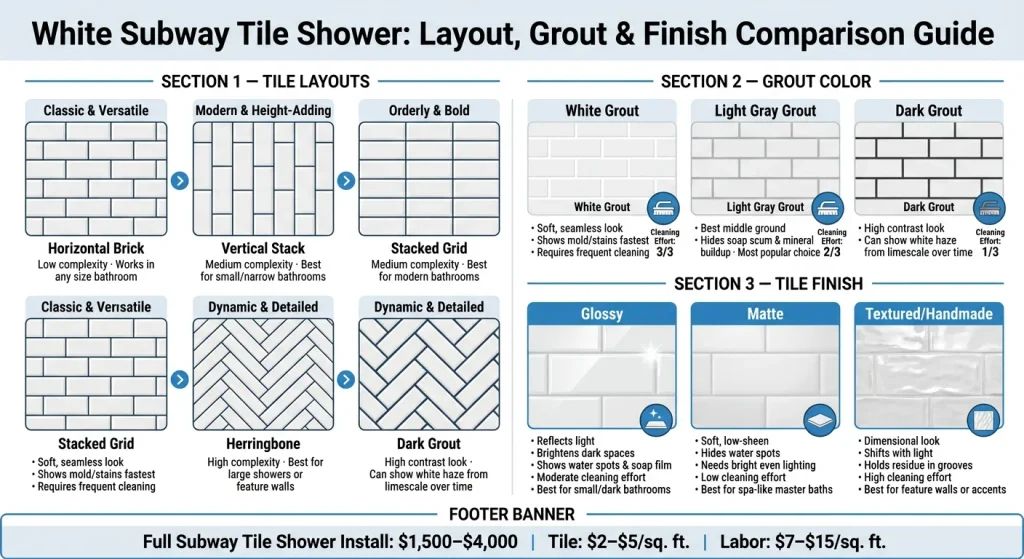 White Subway Tile Shower: Layout, Grout & Finish Comparison Guide
Once the wall system is done, layout, grout, and finish decide whether white subway tile feels sharp and polished or just plain flat. These choices are what keep it from looking cold or builder-basic.
Compare Subway Tile Layouts by Style, Scale, and Labor
The layout changes the mood of the shower right away. A horizontal brick pattern, also called a running bond, feels classic and tends to hide small wall flaws well. Vertical layouts pull the eye up, which can make a low ceiling feel taller and give the room a more designed look. Stacked grid layouts feel neat and pared-back, but they need tight alignment because even slight drift stands out fast. Herringbone brings more motion and detail, though it also means more cuts, more waste, and more labor.
| Layout Type | Visual Effect | Installation Complexity | Best-Fit Bathroom Size |
|---|---|---|---|
| Horizontal Brick | Balanced, familiar | Low | Any size; very versatile |
| Vertical Stack | Modern, adds height | Medium (alignment is critical) | Small or narrow bathrooms |
| Stacked Grid | Orderly, bold | Medium | Modern bathrooms |
| Herringbone | Dynamic, more detailed | High | Large showers or feature walls |
Think of layout as the part that shifts the room’s proportions. It can make the shower feel taller, wider, calmer, or more deliberate. After that, grout color does a lot of the visual heavy lifting.
Pick a Grout Color That Fits the Look and Cleaning Routine
Grout color can change the whole read of the tile. White grout gives you a soft, continuous look, but it’s the toughest to keep looking clean because mold and discoloration show up fast [3][7]. Light gray grout is often the middle ground people land on: it outlines the tile without looking harsh and does a better job of hiding soap scum and mineral buildup than white or dark grout [4][3][6]. Dark grout creates stronger contrast, but soap film and limescale can leave a white or gray haze over time [1][3].
Style matters here, but so do your cleaning habits. If the shower gets heavy daily use, that should shape the choice just as much as the look you want. In wet areas, use epoxy grout; if you go with cement grout, seal it at installation and reseal it on a regular schedule [1][3][4][5].
A good grout choice helps the shower look clean without making upkeep the star of the show. Then finish steps in and changes how the tile handles light.
Choose a Tile Finish Based on Light and Cleaning Needs
Finish affects both brightness and upkeep. Glossy tile reflects light well, so it can help a small or windowless shower feel brighter, but it also shows water spots and soap film more clearly [1][4][6]. Matte tile has a softer, low-sheen look and hides water spots better than glossy tile, though it tends to work best when the room already has bright, even lighting [4][6][7]. Textured or handmade-style tile adds depth and shifts with the light in a more varied way, but those grooves can hold onto residue and need more cleaning attention [2][6][7].
| Finish Type | Visual Effect | Cleaning Effort | Best Lighting | Best Use Case |
|---|---|---|---|---|
| Glossy | Bright, reflective | Moderate | Natural or low light | Small, dark bathrooms |
| Matte | Soft, low-sheen | Low | Bright, even lighting | Spa-like master baths |
| Textured/Handmade-Style | Dimensional, handcrafted | High | Angled or shifting light | Feature walls or accents |
The best finish is the one that fits the bathroom’s actual light, not the light you wish it had. That matters even more when the lighting plan is already locked in.
Use Lighting and Supporting Finishes to Keep White Tile From Looking Flat
Once the layout, grout, and finish are set, lighting and the finishes around the tile will decide whether white subway tile looks crisp or falls flat.
Test White Tile Under the Bathroom’s Actual Lighting
Check tile and grout samples under the bathroom’s actual lighting before you buy. That means bathroom lighting ideas, such as vanity lights, recessed lights, and natural light, during the day.
White tile can look clean in a showroom, then feel flat or harsh once it’s in your bathroom. If the room will depend mostly on artificial light, go with a white tile that has a soft warm undertone. That small shift can make the space feel much less stark.
Add Contrast With Vanities, Flooring, and Hardware
Once lighting is handled, the vanity, floor, and fixtures do a lot of the heavy lifting. They add the contrast that keeps the shower from feeling one-note.
A warm wood vanity can make the room feel warmer and more relaxed. A dark or charcoal vanity gives you a more contemporary, high-contrast look. For flooring, small-format options like hex, penny rounds, or mosaics add texture and help the room avoid that flat, washed-out feel.
Hardware matters too:
- Matte black adds contrast
- Brass adds warmth
- Brushed nickel keeps the look lighter and cleaner
Common Mistakes to Avoid and Where to Spend for Long-Term Results
Once the layout, grout, finish, and lighting are set, the last step is simple: avoid the mistakes that shorten the life of the shower or make it look off.
Most of the biggest problems come from design choices and installation errors, not the tile itself. Weak contrast, poor alignment, or the wrong pattern can make white subway tile feel dull or overly busy. In many cases, the issue isn’t the tile. It’s the prep work and how the tile is installed.
If you’re deciding where to put your money, spend it on waterproofing, a flat substrate, and 100% silicone at movement joints. Those details help protect the shower and lower the risk of cracking.
Use this quick check before you approve the final shower plan:
- Layout: Is the pattern centered on the main wall, with no awkward sliver cuts near corners, niches, or the ceiling? [4]
- Grout: Does the grout color fit your cleaning routine?
- Finish: Does the finish work with the room’s light and cleaning needs?
- Waterproofing: Has the installer confirmed which membrane system is being used, with plumbing penetrations sealed properly?
- Movement joints: Are corners and floor-to-wall transitions sealed with 100% silicone caulk instead of grout? [5]
- Remodel fit: Does the tile scale fit the vanity, floor, and fixtures?
Cost matters too, but not every upgrade is worth it. A standard subway tile shower usually costs $1,500 to $4,000 fully installed [1]. Standard glazed ceramic tile runs about $2 to $5 per sq. ft., while professional labor adds $7 to $15 per sq. ft. [1].
Here’s where spending more tends to pay off and where it mostly doesn’t:
| Budget Category | Approx. Cost Impact | Effect on Durability |
|---|---|---|
| Standard Ceramic (3×6) | Low ($2–$5/sq. ft.) | Moderate; requires sealing |
| Porcelain Tile | Moderate ($3–$8/sq. ft.) | High; low water absorption |
| Waterproof Membrane | Moderate ($100–$300) | Critical; prevents rot and mold |
| Epoxy Grout | Moderate (higher labor) | High; stain and mold resistant |
| Herringbone Layout | High (20%+ labor and waste) | Neutral |
| Metal Trim Profiles | Low ($15–$30/piece) | High; protects tile edges |
Explore bathroom remodeling options built around quality and functionality.
A good rule of thumb: save on tile material if you need to. Standard ceramic can do the job well. But don’t cut corners on prep, waterproofing, or an installer who knows what they’re doing. A clean, well-planned layout with solid backing will usually last longer than a fancy pattern installed over weak prep.